
With the release of vSphere 6.5 VMware has introduced file-based backup solution and now it's become the native backup solution for backing-up VCSA. This file-based backup configuration is available through VCSA management interface and support FTP, FTPS, HTTP, HTTPS, SFTP, NFS, or SMB protocols.
The following considerations apply to file-based backup and restore protocols:
- FTP and HTTP are not secure protocols
- Backup servers must support minimum of 10 simultaneous connections for each vCenter Server
- You must have write permissions for upload and read permissions for download
- Only explicit mode is supported for FTPS
- If you use HTTP or HTTPS, you must enable WebDAV on the backup Web server
- You can use only FTP, FTPS, HTTP, or HTTPS to transmit data through an HTTP proxy server
- You can use IPv4 and IPv6 URLs in file-based backup and restore of a vCenter Server. Mixed mode of IP versions between the backup server and the vCenter Server is unsupported.
- The vCenter Server appliance GUI installer does not support restore from a backup with NFS or SMB protocol. To perform a restore from an NFS or SMB protocol, use the vCenter Server Management API.
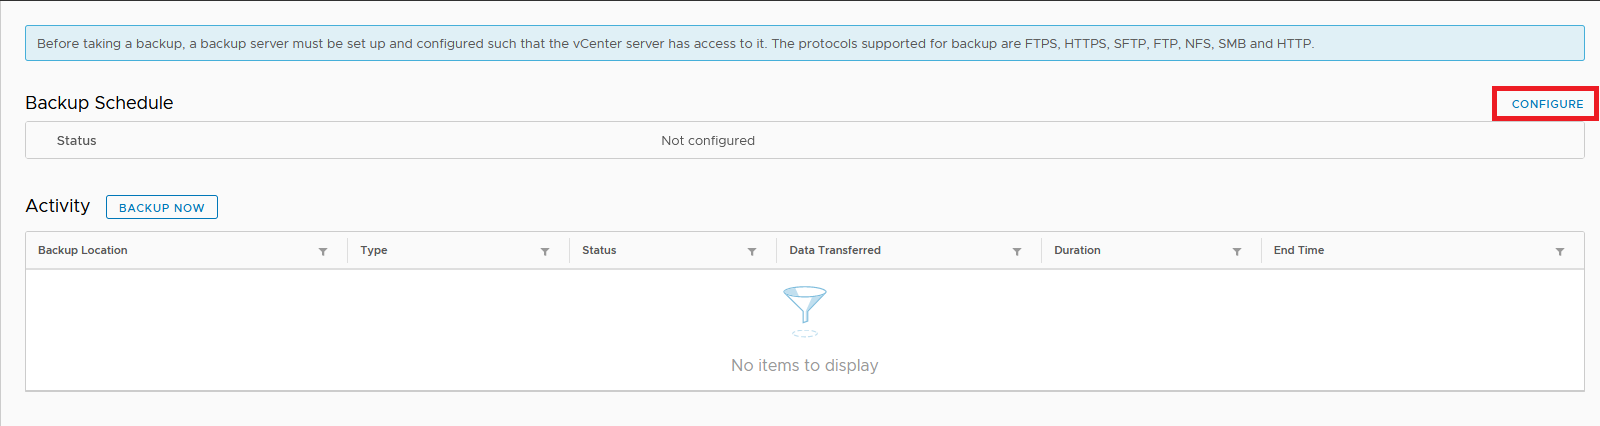
Before taking a backup, a backup server must be set up and configured such that the vCenter server has access to it. The protocols supported for backup are FTPS, HTTPS, SFTP, FTP, NFS, SMB and HTTP.
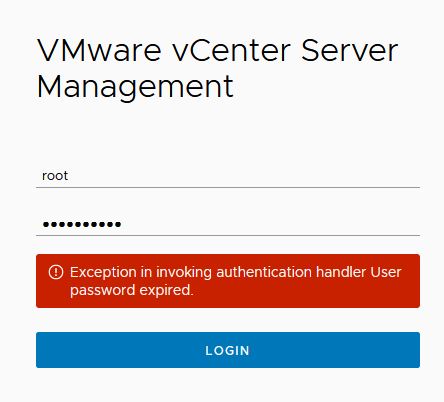
log into VCSA management interface by navigating to https://<<VCSA FQDN or IP address>>:5480/

Click the Backup tab from the left pane and configure option in the top right.
Configure the Backup schedule.
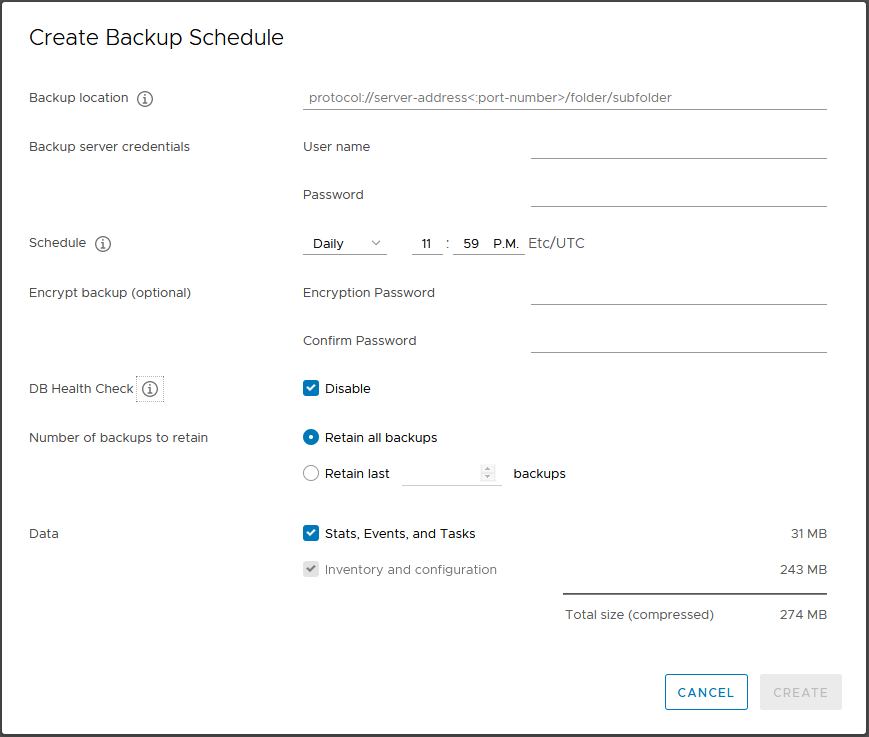
Backup Location: Use the following format to provide the address and location: protocol://server-address<:port-number>/folder/subfolder
Backup server credentials: Enter a user name and password of a user with write privileges on the backup server.
Schedule: The recurrence can be set daily, weekly, or you can customize the schedule to run the backup on a specific day or days of the week. You can specify the time of day to run the backup. The default time is 11:59pm. And its the configured vCenter time.
Encrypt backup (optional): Enter an Encryption Password if you want to encrypt your backup file. If you select to encrypt the backup data, you must use the encryption password for the restore procedure.
DB Health Check: DB Health Check helps you determine the status of your database. Backup will take longer if the DB health check is enabled.
Number of backups to retain: The retention policy either to keep all or number of last backups as per your requirement.
Data: (Optional) Select Stats, Events, and Tasks to back up additional historical data from the database.
Once the above details are filled, click Create button to create new backup policy. You can see the backup policy status under the Backup Schedule section and also you have the options to Edit, Disable or Delete.

Also you can take a manual backup using Backup Now option in the activity section.

This wizard will ask you the backup location and credentials, but if you select to use the backup location and user name from backup schedule it will automatically get the required data from the backup schedule. Then click Start to take the manual backup.
You can monitor the progress in the activity section.
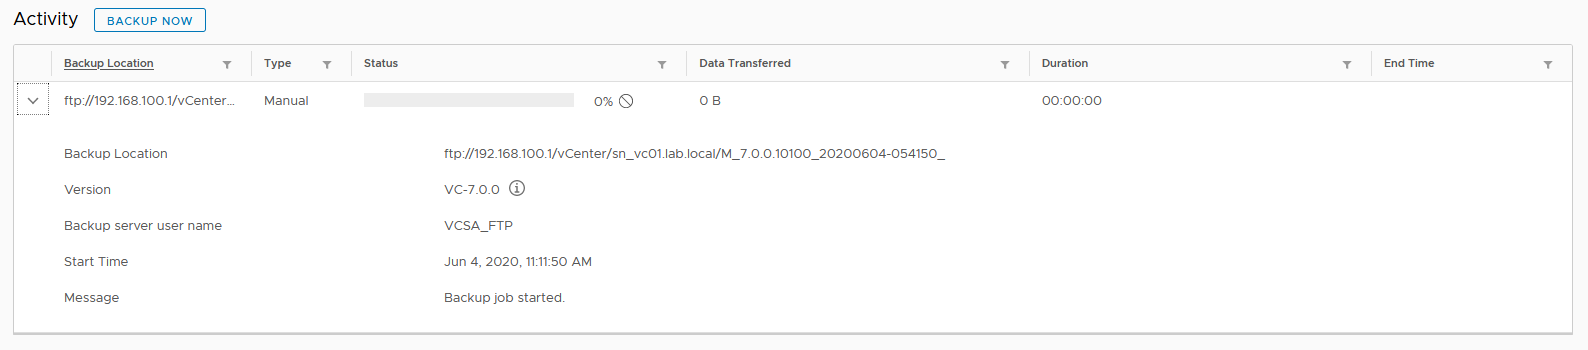
Also the recent backup information will be displayed here.

Restore VCSA Using Existing Backup
To restore a VCSA from a file-based backup we needs to run the VCSA installer and in first stage it will deploy a OVA file and then in stage two it will copy data from the backup to this newly created VCSA.
Important:
- If the vCenter Server instance is part of a vCenter High Availability cluster, you must power off the active, passive, and witness nodes of the cluster before restoring the vCenter Server.
- The restore process requires that both the installer and backup versions are identical.
Run the installer.exe located at L:\vcsa-ui-installer\win32 (L is the drive where I mounted the .iso file) and select the restore option.

The first screen will give you an introduction about the restore process and the next stage will the EULA. Then it will ask for the backup details.

Use 'Address/Folder/Subfolder' format to provide the address and location and the remote location must contain the valid metadata JSON file.
In the next step it will show the backup details.

Then it will prompt for vCenter Server deployment target settings. The target is the ESXi host or vCenter Server instance on which the vCenter Server will be deployed.

Then you will be prompted for VM settings for this new VCSA.

Then select the deployment size of this new VCSA

And the datastore.

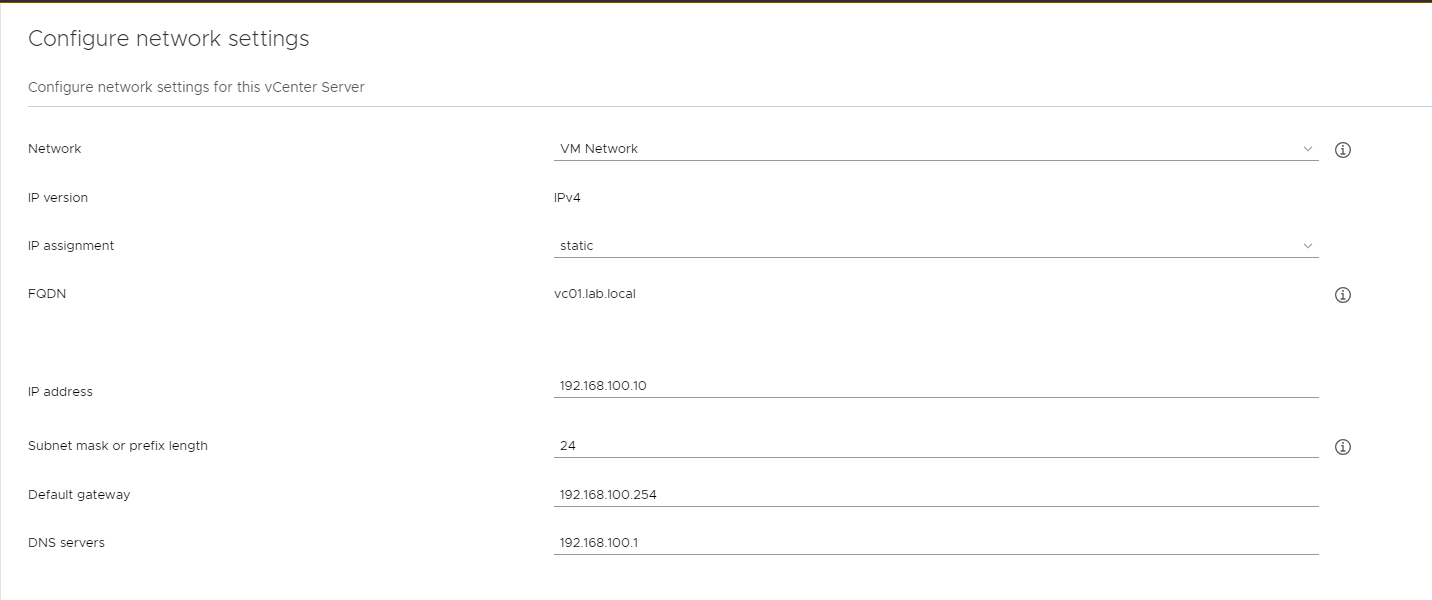
The next screen will auto populate the network settings from the given backup. here you can change or you can keep the current settings as it is. If you are keeping existing IP then make sure you have powered off the old VCSA to avoid IP conflicts.
Once review the details click Finish to start the stage 1 process.


Once the deploy stage finish, we can continue with the stage 2.

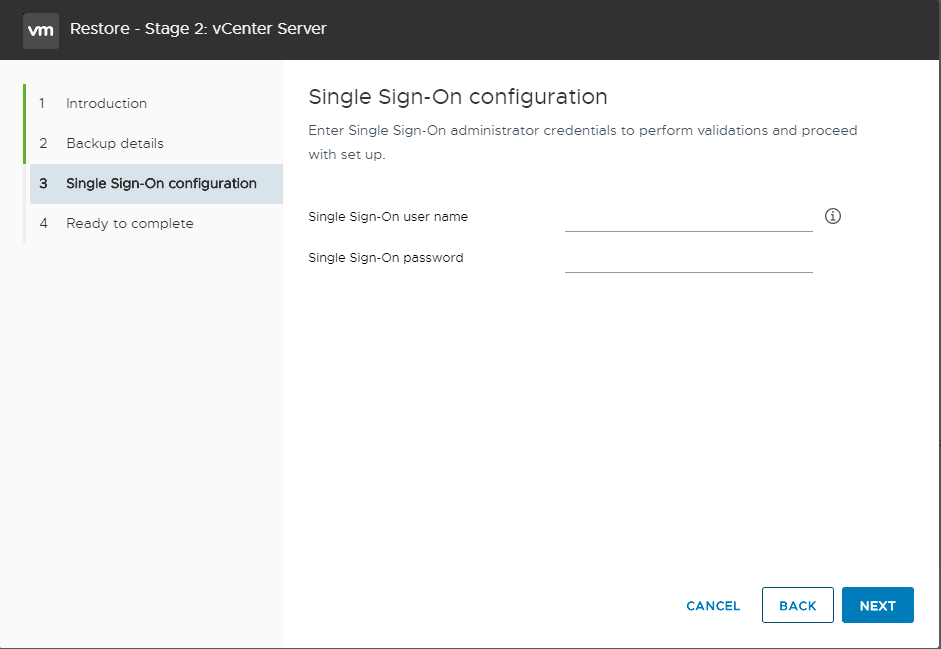
After the introduction screen, it will display the backup details from the selected backup file in the stage 1. and in the next screen it will ask you the SSO credentials. Here you have to enter the SSO password which you old VCSA had.
Then it will run a validation it self and display the errors and warnings. If you get any errors you have to fix those and if you have only warnings and you are happy to continue you can ignore the warnings as well.
Then again it will show you the summary and you can click finish to configure the new VCSA as per the configuration in the selected backup file.

This mechanism will deploy new VCSA and restore data onto it not to the original VCSA. If you have restored a corrupted VCSA from a file-based backup you have to manually remove the corrupted VCSA from the inventory.


0 Comments